How to Keep a Bathroom Free of Mold: Cut Humidity, Stop Spores

Bathroom mold is one of those problems that seems inevitable — grout turns black, caulk goes pink, and the ceiling above the shower develops a fuzzy grey patch that no amount of scrubbing fully fixes. It isn’t inevitable, though. The conditions that let mold thrive are almost entirely controllable, and once you understand what mold actually needs, keeping it out of your bathroom becomes a straightforward maintenance routine rather than a losing battle.
Why Bathrooms Are Prime Mold Territory
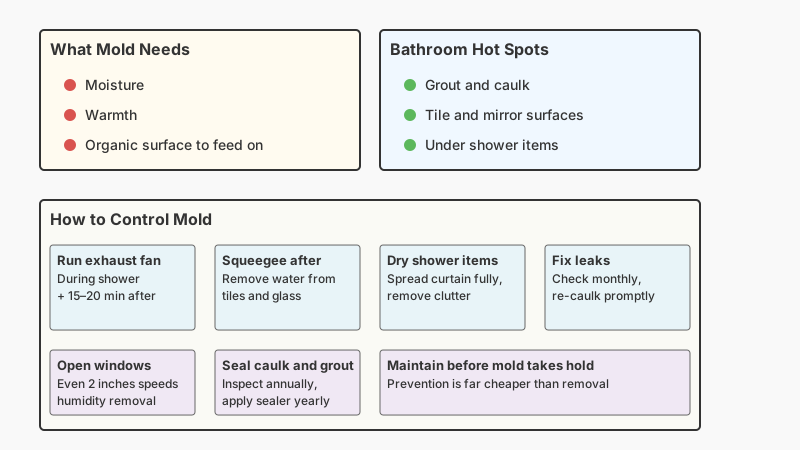
Mold is a fungus that reproduces through airborne spores. Those spores are everywhere — in your home, in outdoor air, on your clothes. What turns a harmless spore into a spreading colony is the right combination of moisture, warmth, and an organic surface to feed on. Bathrooms tick every box.
A single shower raises indoor humidity dramatically. If that moisture has nowhere to go — no fan, no open window, a tightly sealed modern bathroom — it condenses on cool surfaces: tiles, mirrors, the underside of the toilet tank, the silicone bead around the bath. Condensation sitting on grout or caulk for even a few hours gives mold a foothold.
The most common bathroom molds are Cladosporium, Penicillium, and Aspergillus, which tend to appear as black, green, or grey patches. The notorious Stachybotrys chartarum (black mold) requires sustained, heavy moisture — think a slow leak behind the wall, not a single wet shower — but it does occur in bathrooms with chronic water damage. If you suspect that kind, get a professional assessment rather than DIY-ing it.

The 12 Steps to a Mold-Free Bathroom
1. Run the Exhaust Fan — Properly
This is the single most effective intervention. An exhaust fan’s job is to pull humid air out of the room before it condenses. The catch: most people turn it off the moment they finish showering, which is too soon. Run it during every shower and for at least 15–20 minutes afterward. On a timer switch, this is effortless.
Fan capacity matters. Bathroom fans are rated in cubic feet per minute (CFM). A rough rule of thumb from the Home Ventilating Institute: for bathrooms up to 100 square feet, you need at least 1 CFM per square foot of floor space. A bigger bathroom or a particularly steamy household needs more. If your current fan sounds like a jet engine but the mirror stays foggy, it may be old, blocked with lint, or just undersized — worth replacing.
2. Open Windows When You Can
Cross-ventilation is free and fast. Even cracking a window two inches while you shower, combined with running the fan, dramatically accelerates humidity removal. In temperate climates, this works year-round. In cold winters, the humidity drop outweighs the heat loss for a short shower window.
3. Fix Leaks Without Delay
A dripping tap or a slow leak at the base of a toilet provides constant moisture — exactly what mold needs for a permanent colony. Check under sinks monthly. If the silicone around the bath or shower tray has cracked, re-caulk it promptly. Water sneaking behind tiles is invisible until you have a serious mold or structural problem.
4. Squeegee Tiles and Glass After Every Shower
It takes 30 seconds and removes the majority of water sitting on tile and glass surfaces. Less standing water means faster drying means fewer hours of mold-friendly moisture. A simple suction-cup squeegee hung inside the shower makes this easy to remember.
5. Dry the Shower Curtain or Door
Shower curtains, especially fabric ones, stay damp for hours. After showering, spread the curtain fully open so air can circulate around every fold. Fabric curtains should go through the washing machine every month or two — most are machine-washable on a gentle cycle with a cup of white vinegar added. Plastic liners are cheap enough to replace every six months if mold takes hold.

6. Reduce Clutter on Shelves and Ledges
Shampoo bottles, soap bars, and loofas left sitting in the corner of the shower trap moisture underneath them and create dark, poorly ventilated micro-environments where mold flourishes. Store products in a ventilated caddy that hangs from the shower head, or remove them from the shower entirely between uses. Avoid leaving wet natural sponges or loofahs in the shower — they’re essentially mold farms.
7. Re-Caulk and Re-Grout Regularly
Caulk and grout are porous and degrade over time. Once the surface integrity breaks down, water seeps into the substrate where no amount of surface cleaning reaches. Inspect caulk lines annually — if they’re cracked, pulling away, or discoloured beyond surface staining, replace them. This is a Saturday-morning job that costs a few dollars in materials and prevents hundreds of dollars in remediation later.
For grout, apply a penetrating grout sealer once a year. It takes 20 minutes and creates a water-resistant barrier that mold spores can’t easily colonize.
For grout lines that are already discolored, see How to Clean Grout Between Tiles: Matching Grime Level To Method for a deeper approach before you re-caulk.
8. Use a Dehumidifier in Severe Cases
If your bathroom is in a basement, has no fan or window, or you live in a genuinely humid climate, a small portable dehumidifier can make a meaningful difference. Aim to keep bathroom humidity below 60% — ideally in the 40–55% range. Inexpensive humidity gauges (hygrometers) are widely available and tell you exactly where you stand.
9. Choose Mold-Resistant Products for Repairs
When you’re repainting, re-tiling, or renovating, make material choices that resist mold from the start:
- Mold-resistant drywall (sometimes called greenboard or purple board) is formulated for damp environments and should be standard in any bathroom renovation.
- Mold-resistant paint contains antimicrobial additives. Major paint brands offer bathroom-specific formulas; they’re worth the modest price premium.
- Epoxy grout is far less porous than traditional cement grout and doesn’t harbour mold the same way.
10. Clean Regularly With the Right Products
Prevention is the goal, but cleaning still matters. Weekly wiping of tile and grout with a basic bathroom cleaner removes the soap scum and organic residue that mold feeds on. For existing mold spots on non-porous surfaces:
- White vinegar (undiluted, applied and left for an hour) kills many mold species effectively. Research published in the International Journal of Environmental Research and Public Health found vinegar effective against Penicillium chrysogenum on surfaces.
- Hydrogen peroxide (3%) is another effective, low-toxicity option — spray, leave 10 minutes, scrub.
- Diluted bleach (1 cup per gallon of water) is the most powerful option for non-porous surfaces like ceramic tile, but it doesn’t penetrate porous materials like grout deeply enough to kill roots, and it must be used with ventilation.
Never mix bleach with vinegar or any ammonia-based cleaner — the resulting fumes are toxic.
11. Don’t Leave Wet Towels and Bathmats
A sodden bathmat left flat on the floor stays damp for most of the day. Hang bathmats to dry after every use, or rotate two so each has time to dry fully. Same with towels — a towel bunched on a hook doesn’t dry; spread it open. Wash bathmats weekly.
12. Check Hidden Areas Periodically
Mold often starts where you’re not looking: behind the toilet, under the sink cabinet, around the base of the toilet, behind freestanding shelving. Take five minutes every month or two to look in these spots. Early-stage mold — a small pink or grey patch — wipes off easily with vinegar or a bathroom cleaner. Left for months, it becomes a much bigger removal project.

What to Do If Mold Has Already Taken Hold
Surface mold on tiles and caulk is a DIY job. Mold that has penetrated behind walls, under flooring, or spread to a large area (generally cited as more than 10 square feet by the U.S. Environmental Protection Agency) warrants professional remediation. Disturbing a large colony without containment can scatter spores through the rest of your home.
For smaller patches on grout that won’t respond to vinegar or hydrogen peroxide, a paste of baking soda and water scrubbed in with an old toothbrush often does the trick mechanically. If grout is black all the way through, replacing it is more effective than repeated cleaning.
If someone in the household has respiratory sensitivities or asthma, err on the side of professional assessment even for smaller patches — the species matters, and some individuals react more severely.
If mold has already gotten a foothold despite your best efforts, our detailed guide Remove Mold & Mildew from Bathroom Surfaces Safely walks you through safely removing it for good.
The Routine That Actually Works
The most effective mold-prevention strategy isn’t any single product or technique — it’s a consistent habit loop:
- During every shower: Fan on, window cracked if possible.
- Immediately after: Squeegee tiles and glass, spread curtain open.
- Fan stays on: For 15–20 minutes after you leave.
- Weekly: Wipe tiles and surfaces, hang bathmat to dry.
- Monthly: Quick inspection of hidden areas, check under sink for drips.
- Annually: Re-seal grout, inspect caulk, replace anything cracked or discoloured.
None of these steps takes significant time or money. The investment is attention and consistency. A bathroom that stays dry stays mold-free — it’s that direct a relationship.