Can You Really Repair Drywall Holes Yourself?
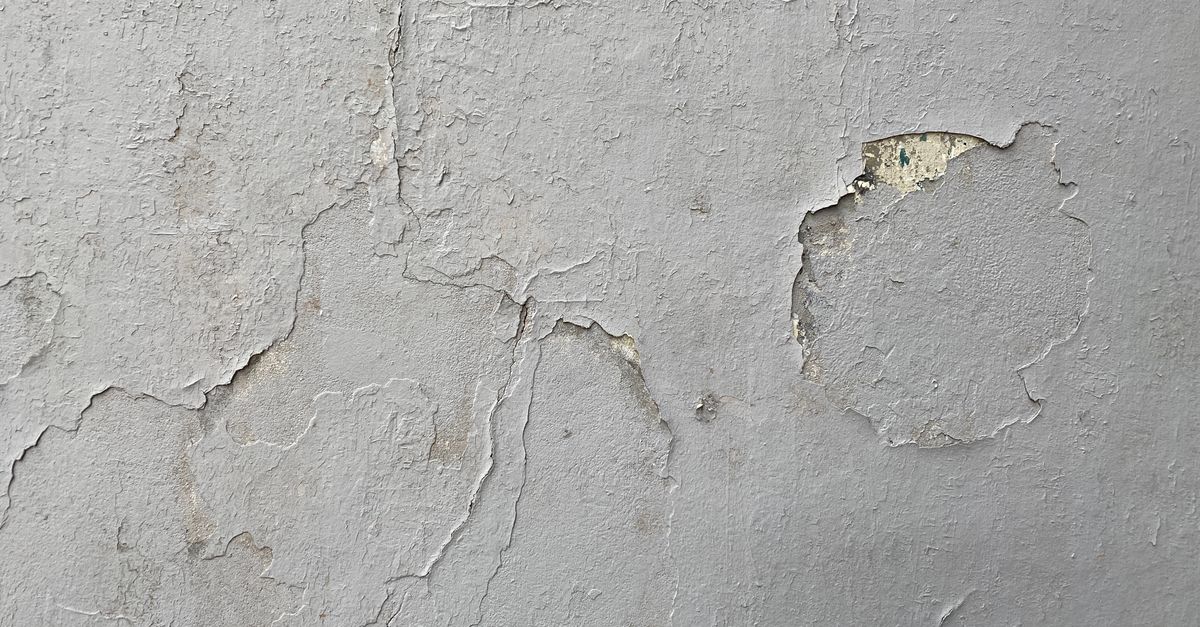
Drywall holes are one of those household problems that look complicated but are almost always within reach of a patient beginner. The tools are cheap, the materials are forgiving, and the window between “this looks terrible” and “you can’t tell it was ever there” is shorter than most people expect. The hole size determines which method you reach for, so that’s where to start.
Size Is Everything: Matching the Fix to the Hole
Choose the wrong method and you waste an afternoon; choose the right one and the repair is done in a single session. A rough guide by diameter:
- Nail holes and hairline cracks: Spackle from a tub, a putty knife, done in minutes.
- Small holes (roughly thumbnail to tennis-ball size): A self-adhesive mesh patch or the California patch (cut-out method using a piece of drywall).
- Large holes (wider than roughly a handspan): A backing-board repair using a new piece of drywall screwed to timber supports behind the wall.
Those categories aren’t rigid rules. What actually matters is whether the patch has something solid to grip. Tiny holes can be filled without any backer. Medium holes need a patch that bridges the gap and stays flat. Large holes need a rigid frame.
Fixing Small Holes: Mesh Patches and Spackle
For holes up to the size of a closed fist, a self-adhesive mesh patch is the fastest route. The patch sticks over the hole, then you skim joint compound (also called “mud”) over it in thin coats.
What you’ll need: A tub of pre-mixed joint compound, a 6-inch and a 10-inch putty knife or drywall knife, a self-adhesive mesh patch, fine-grit sandpaper (around 120-grit), a damp cloth, and primer.
The process:
- Clean away any loose paper or crumbling drywall around the hole. The edges need to be firm, not flaking.
- Press the mesh patch centered over the hole. Smooth it flat with your hand.
- Apply joint compound over the mesh with your 6-inch knife, pressing it into the mesh and feathering the edges outward. Don’t try to build it up in one coat — a thin coat that dries flat is far better than a thick coat that shrinks and cracks as moisture leaves it.
- Let the first coat dry fully. Pre-mixed compound changes from dark gray to bright white as it dries. Rushing this step is the single most common mistake.
- Apply a second coat with the wider knife, extending the feathered edge another few inches beyond the patch to blend the transition gradually.
- Sand lightly when dry, wipe away dust with a damp cloth, prime, and paint.
Expect two to three coats of compound for a seamless result. Each coat after the first should be thinner and wider than the last.
If you’re dealing with a single small dent rather than a larger hole, our focused walkthrough How to Patch a Small Hole in Drywall: Making Doorknob Dents Disappear covers the mesh-and-spackle technique in more detail.
The California Patch: Clean Results for Medium Holes
For holes that are too big for a mesh patch to bridge cleanly but not so large they need timber backing, the California patch (also called the blow-in patch or butterfly patch) is worth knowing. It uses a piece of scrap drywall as its own backer.
How it works:
- Cut a piece of drywall a few inches larger on all sides than the hole.
- Score the back of this patch piece, then snap and peel away the gypsum, leaving only the face paper extending about an inch and a half around all four edges. You now have a piece of solid drywall with a paper border — that paper is the key.
- Hold the patch over the hole, trace its outline, and cut the wall to match the gypsum core (not the paper flap).
- Apply joint compound around the perimeter of the cut-out, then press the patch in. The paper flap overlaps onto the surrounding intact wall and embeds in the wet compound.
- Feather and finish with additional coats as described above.
The California patch is elegant because you skip any separate backer board. It does take practice to score cleanly, so use a sharp utility knife and a straightedge.
Large Holes: The Backing-Board Method
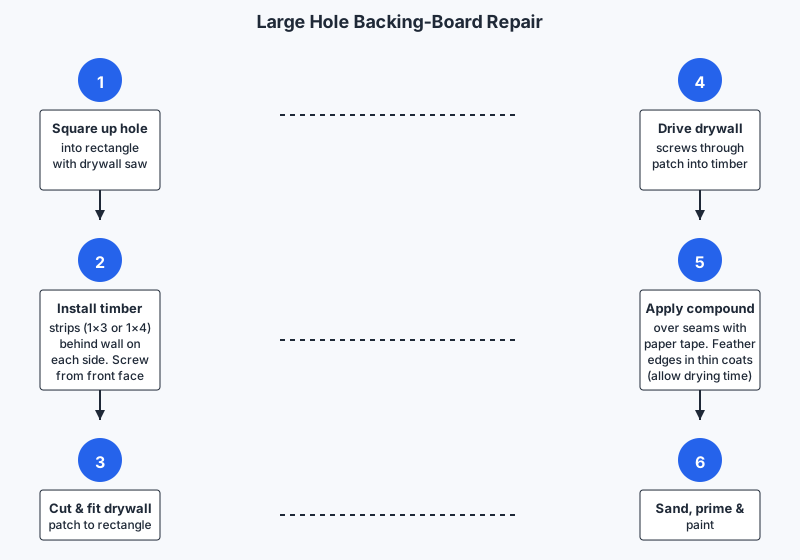
A hole bigger than roughly a handspan needs a rigid frame to support the new drywall piece. Without it, the patch will flex and crack along the seam no matter how well you apply compound.
What you’ll need: A piece of drywall cut to fit, two strips of timber (1×3 or 1×4 lumber works), drywall screws, a drill-driver, joint compound, paper or mesh tape, sandpaper, and primer.
The process:
- Use a drywall saw to square up the hole into a rectangle. A clean geometric shape is much easier to patch than a ragged oval.
- Cut two timber strips long enough to extend a few inches above and below the hole inside the wall cavity. Slip them behind the drywall on each side of the opening and drive screws from the front face of the existing drywall into each strip to hold them flush.
- Cut a drywall patch to fit the rectangle exactly. It should sit flat when dropped into the opening.
- Drive drywall screws through the patch into the timber strips. Dimple the screw heads just below the surface — don’t tear the paper face.
- Apply joint compound over the seams and embedded paper tape (or mesh tape). Feather out and build up in thin coats exactly as with smaller repairs.
- Sand, prime, and paint.
One detail often missed: always use paper tape over the seams on large repairs rather than relying on mesh tape alone. Paper tape embeds in compound more reliably and produces a stronger, crack-resistant seam. Mesh tape is convenient on small patches; paper tape earns its place on long straight seams.
Matching Texture Before You Paint
A perfectly flat patch on a textured wall is almost as obvious as the original hole. Common wall textures and how to approach them:
- Orange peel: Apply a light mist of joint compound or texture spray from an aerosol can. Hold the can far enough back that the droplets hit the wall as small, irregular dots rather than blobs. Practice on cardboard first.
- Knockdown: Thin some joint compound to a loose consistency and apply random, slightly overlapping dabs with a large knife or sponge. Let it firm up for a few minutes, then flatten the peaks lightly with the knife. The timing takes a few practice runs.
- Skip trowel: Similar to knockdown but applied with a curved-blade trowel in overlapping arcs. More technique-dependent than the others.
- Smooth walls: Easier in one sense — no texture to match — but any unevenness is visible in raking light. Multiple thin coats and thorough sanding matter more here.
For all texture work, prime the repaired area before texturing if you want the texture to behave consistently. Bare compound is absorbent and changes how wet texture dries compared to primed or painted surfaces around it.
Once your patch is invisible, you might also want to tackle the rest of the room’s appearance with tips from How to Make a Small Room Look Bigger: Light, Color, And Tone Tricks.
Priming and Painting: Don’t Skip the Primer
Unprimed joint compound absorbs paint unevenly. Even one coat of primer separates a repair that disappears under paint from one that shows up as a dull, matte ghost (called “flashing”) no matter how many paint coats go on. Use a drywall primer or a standard interior PVA primer before painting. If you’re matching an existing paint sheen, the sheen type matters as much as the color: flat paint hides minor surface variations that satin or semi-gloss will reveal.
Frequently Asked Questions
How long does joint compound take to dry between coats?
Pre-mixed joint compound typically takes between four and twenty-four hours per coat, depending on how thick the application is, the room temperature, and the humidity. A thin coat in a warm, dry room can be ready in a few hours. A thicker coat in a cool or humid space may need overnight. Always wait until the compound is uniformly white before sanding or recoating.
Can I use spackle instead of joint compound for larger holes?
Spackle works well for very small holes and surface dings because it dries faster and shrinks less. For medium and large patches, joint compound is a better choice. It feathers more smoothly over wide areas, accepts tape well, and sands to a finer finish. Fast-drying “setting-type” compound (sold as a powder you mix with water) is also useful when you need to build up depth quickly, since it hardens by chemical reaction rather than by drying, and shrinks less than pre-mixed compound.
Why does my patch crack after it dries?
The most common cause is applying compound too thick in a single coat. Compound shrinks as moisture leaves it, and a thick layer pulls itself apart before the surface is fully dry. Building up in thin coats solves most cracking problems. A second cause is applying a new coat over a coat that hasn’t dried through — it may feel dry at the surface while still wet underneath. When in doubt, give it more time.
Do I need to match the drywall thickness?
For backing-board repairs, yes — thickness matters. Standard residential walls typically use either half-inch or five-eighths-inch drywall. If your patch piece is thinner than the surrounding wall, the repair will sit recessed and require a heavy build-up of compound to level out. Check the edge of the existing drywall at the hole to measure thickness before buying patch material.
Is this safe to attempt near electrical outlets or switches?
Cut carefully and slowly whenever you’re working near outlets, switches, or any area where wiring might run. Use a stud finder that also scans for live wires, and avoid cutting deeper than the drywall itself — typically around half an inch to five-eighths of an inch. If you see wiring in the hole, stop and assess before continuing. Any repair involving wire disturbance or work inside an electrical box should be handled by a licensed electrician.