How to Clean a Leather Sofa: Avoid The Watermarks And Cracked Finish

Leather sofas are an investment, and a dirty one starts looking tired fast. The good news is that cleaning leather properly isn’t complicated — but it does require the right approach. Use the wrong product or technique and you can strip the finish, crack the surface, or leave permanent watermarks. This guide cuts through the noise and gives you a clear, step-by-step method that works on most finished (protected) leather sofas, plus guidance for aniline and suede-type leather that needs extra care.
Know Your Leather Before You Start
Not all leather is the same, and cleaning the wrong type the wrong way is how damage happens.
Protected (Pigmented) Leather
This is the most common type used on sofas. It has a polymer coating that gives it a uniform colour and makes it relatively easy to clean. You can usually identify it by dabbing a drop of water on an inconspicuous spot — if the water beads up rather than soaking in, it’s protected leather. Most cleaning methods in this guide apply here.
Aniline Leather
Aniline leather is dyed all the way through with no protective surface coating. It has a natural, soft feel but it’s also porous and vulnerable. Water will darken it temporarily, and harsh cleaners can cause permanent staining. Treat it with specialist aniline leather products only.
Semi-Aniline Leather
A middle ground — lightly coated. Slightly more forgiving than full aniline, but still needs gentle handling.
Nubuck and Suede
These have a napped, buffed surface. Do not use liquid cleaners on them. Use a dry brush or specialist eraser instead.
Quick check: Look on the underside of a cushion or behind a back panel for a care tag. Codes like W (water-based cleaner), S (solvent-based cleaner), or X (vacuum only) are sometimes stamped there.

What You’ll Need
Before you start, gather your supplies. Using the wrong materials is one of the most common mistakes.
For general cleaning:
- Soft microfibre cloths (at least 3–4)
- A vacuum cleaner with a soft brush attachment
- Mild dish soap or a dedicated leather cleaner
- Distilled water (tap water can leave mineral deposits)
- A leather conditioner
Avoid these entirely:
- Baby wipes — many contain alcohol, aloe, or fragrances that degrade leather
- Bleach or ammonia-based cleaners
- Abrasive sponges or scrubbing pads
- Olive oil or coconut oil — popular home remedies that go rancid, attract bacteria, and can darken leather permanently
- Excess water — leather should be cleaned damp, not wet
Step-by-Step: How to Clean a Leather Sofa
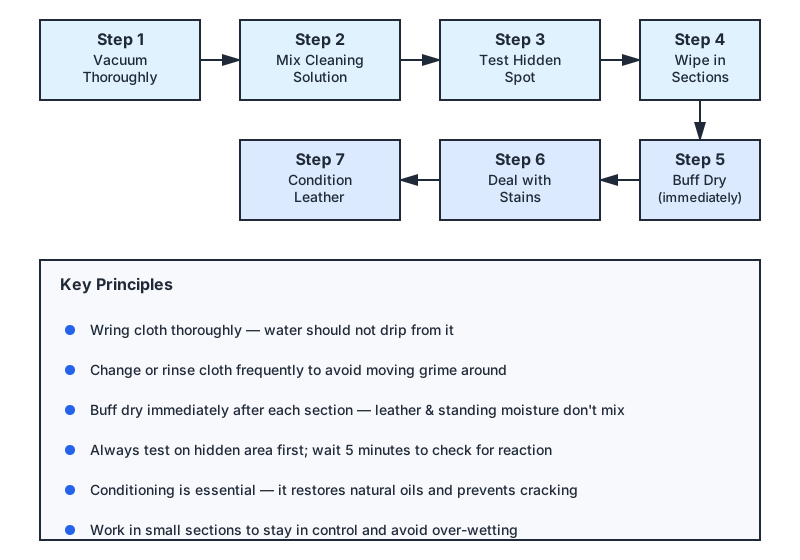
Step 1: Vacuum Thoroughly
Start by removing all cushions and vacuuming the entire sofa with a soft brush attachment. Pay attention to seams, crevices, and the area under the seat cushions. Crumbs, dust, and pet hair act as abrasives and will scratch the surface if you rub them in during the cleaning stage. This step is unglamorous but genuinely important.
Step 2: Mix Your Cleaning Solution
For protected leather, mix a few drops of mild dish soap into about 500 ml (roughly 2 cups) of distilled water. The solution should be barely sudsy — you want moisture and gentle surfactant action, not foam. If you’re using a commercial leather cleaner, follow the product’s dilution instructions.
Step 3: Test in a Hidden Spot
Dip a microfibre cloth into the solution and wring it out until it’s barely damp. Apply it to a hidden area — the back of the sofa, the underside of an arm — and wait five minutes. Check for colour change, darkening, or any surface reaction. If it looks fine, continue.
Step 4: Wipe in Sections
Work in small sections, wiping in gentle circular motions. Use a clean, damp cloth rather than soaking the surface. Wring the cloth out thoroughly before each pass — if water is dripping from the cloth, it’s too wet. As you clean, you’ll often see the cloth picking up a greyish residue: that’s body oils, dust, and surface grime.
Change cloths or rinse frequently. Cleaning with a dirty cloth just moves grime around.
Step 5: Buff Dry
Immediately after wiping each section, use a dry microfibre cloth to buff away any remaining moisture. Don’t let the cleaning solution sit on the surface. Leather and standing moisture are not friends.

Step 6: Deal with Stains Individually
For specific stains, a targeted approach works better than scrubbing:
- Ink: Dip a cotton swab in rubbing alcohol, dab gently (do not rub), and blot with a dry cloth. Work from the outside of the stain inward. Repeat cautiously — alcohol can strip finish if overused.
- Grease or oil: Sprinkle a small amount of cornstarch or baking soda directly on the stain and leave it for 2–4 hours to absorb the oil. Brush away gently with a soft cloth. Do not add water.
- Food and drink spills: Blot immediately with a dry cloth. Never rub — rubbing spreads the stain and pushes it deeper. Once you’ve blotted the bulk of the spill, use the mild soap solution as above.
- Mould or mildew: Mix equal parts water and white vinegar, apply sparingly with a damp cloth, then dry immediately. Ventilate the room well. If mould covers a large area, consider a specialist leather restoration service rather than a DIY fix.
Step 7: Condition the Leather
This is the step most people skip, and it’s the one that makes the biggest long-term difference. Cleaning removes grime but also strips some of the leather’s natural oils. Without conditioning, leather dries out, stiffens, and eventually cracks.
Apply a purpose-made leather conditioner with a clean cloth, working it in with gentle circular motions. Let it absorb for 10–15 minutes, then buff off any excess. You don’t need a thick coat — a thin, even layer is more effective.
How often should you condition? Roughly every 6–12 months for a sofa that’s used regularly. In dry climates or heated homes where humidity stays low, lean toward the shorter interval.
Routine Maintenance: Keeping It Clean Between Deep Cleans
A well-maintained leather sofa only needs a full clean once or twice a year. What keeps it looking good the rest of the time is a simple routine:
- Weekly: Wipe down with a dry or barely-damp microfibre cloth to remove dust and surface oils from skin contact.
- Immediately after spills: Blot — never rub — with a dry cloth.
- Keep it out of direct sunlight: UV light dries and fades leather faster than almost anything else. If your sofa is near a south-facing window, consider UV-blocking window film or rearrange the furniture layout.
- Avoid sharp objects: Keys, belt buckles, and pet claws are the most common culprits for scratches on leather sofas.
- Control humidity: Very dry air accelerates cracking. A humidifier in winter can genuinely extend your sofa’s life.

If you’re on a roll tackling neglected surfaces, our guide to How to Deep Clean Baseboards and Trim: A Room-by-Room Guide tackles another spot that often gets overlooked between cleanings.
When to Call a Professional
Some situations are beyond the reach of a DIY clean:
- Deep scratches, peeling, or cracking across large areas
- Severe fading from sun damage
- Extensive mould growth
- Colour transfer that won’t lift (common with dark denim rubbing against lighter leather)
Leather restoration specialists can re-dye, re-finish, and repair damage that would otherwise mean replacing the piece. For a quality sofa, the cost of professional restoration is often far less than replacement.
For other household chores where a careful DIY approach usually beats hiring outside help, check out How to Clean a Ceiling Fan: 7 Simple Steps for Spotless Blades.
Common Mistakes Worth Naming
A few traps people fall into repeatedly:
- Using too much water. It causes watermarks and can damage the backing material.
- Cleaning with saddle soap too frequently. Saddle soap is designed for equestrian leather and can be too alkaline for furniture finishes with repeated use.
- Skipping the conditioner. Cleaning is only half the job.
- Using ’natural’ oil substitutes. Coconut oil and olive oil are frequently recommended in home-hack articles. They don’t properly penetrate leather the way formulated conditioners do, and they eventually go rancid.
- Rubbing stains instead of blotting. This spreads the stain and forces it deeper into the grain.
Conclusion
Cleaning a leather sofa properly comes down to a few non-negotiable principles: know your leather type, use gentle products, never over-wet the surface, and always finish with a conditioner. Done right, this routine takes less than an hour and can add years to the life of your sofa. The biggest risk isn’t the cleaning itself — it’s skipping steps or reaching for the wrong product. Follow the method above, and your leather sofa will look better for it.