How to Clean a Ceiling Fan: 7 Simple Steps for Spotless Blades

Ceiling fans are one of those household items that do their job quietly until you actually look up at them. At that point, the ridge of grey fuzz along every blade is hard to ignore. Cleaning a ceiling fan is a 15-minute task when you know what you’re doing — and skipping it costs you more than aesthetics. Dust-laden blades can reduce airflow efficiency, aggravate allergies, and even throw the fan slightly off balance, producing that subtle wobble you’ve been blaming on the motor.
This guide walks through the full process, from the right tools to finishing touches that keep dust from settling again so fast.
Why Ceiling Fans Get So Dirty (and Why It Matters)
The physics are straightforward. A spinning blade creates a slight pressure differential — higher pressure on the pushing face, lower on the trailing edge. Dust particles carried in the air are attracted to that low-pressure zone and stick, particularly when the blade surface carries any static charge. The waxy or lacquered finish on many fan blades makes things worse by giving particles something to cling to.
Beyond appearance, a thick layer of dust changes the blade’s aerodynamic profile. Research published by the American Society of Heating, Refrigerating and Air-Conditioning Engineers (ASHRAE) has documented how blade fouling affects airflow in industrial fans; the same principle scales down to residential ceiling fans — even a few millimetres of buildup can reduce effective airflow. The result is a fan working harder to move less air, which can shorten motor life over time.
For allergy sufferers, a ceiling fan that hasn’t been cleaned in months functions like a dust dispersal device every time it switches on.
What You’ll Need Before You Start
You probably have most of this already:
- A step ladder or sturdy step stool — tall enough to reach the blades comfortably without overreaching
- A pillowcase (old or dedicated) — the single best tool for trapping dust rather than spreading it
- Microfiber cloths — at least two: one slightly damp, one dry
- A small bucket of warm water with a few drops of dish soap
- All-purpose cleaner or white vinegar solution (1 part white vinegar to 1 part water works well on grease)
- A dry paintbrush or soft-bristle brush — useful for light dusting between deep cleans
- Rubber gloves if your skin is sensitive
- A drop cloth or old sheet on the floor below
Fancy ceiling fan cleaning kits exist — tongs with microfiber pads that grip the blade on both sides — and they’re genuinely useful for maintenance dustings if you don’t want to pull out a ladder every time. They’re not essential for a thorough clean, though.

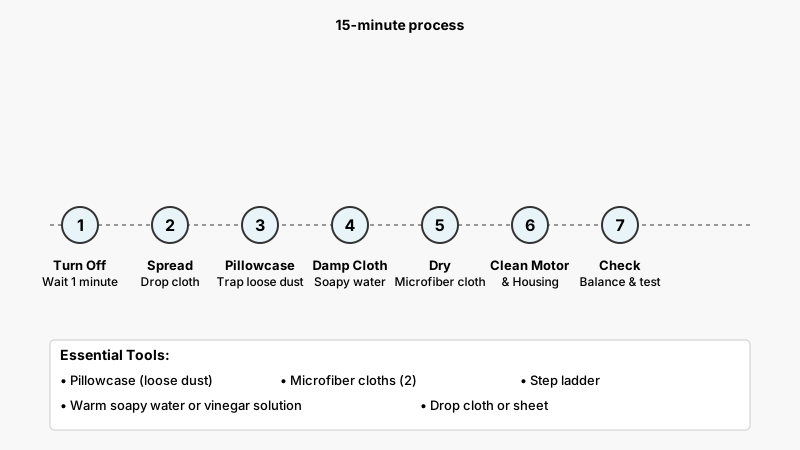
7 Steps to a Truly Clean Ceiling Fan
Step 1: Turn the Fan Off and Wait
This sounds obvious, but wait a full minute after switching off. Blades carry momentum and can surprise you. Also, cleaning a stationary blade is safer and more effective than trying to hold one still while it creeps forward.
If you’re working near an electrical panel you’re unfamiliar with, flip the breaker for that room as an extra precaution — especially if you plan to wipe down the motor housing with a damp cloth.
Step 2: Spread a Drop Cloth Below
Even with the pillowcase method, some dust will escape. A drop cloth or old bedsheet protects floors and furniture. If the room has upholstered furniture directly below, move it or cover it.
Step 3: Use the Pillowcase Method for Blades
This is the technique that actually works. Slip an old pillowcase over one blade, then pull it back slowly, dragging the dust into the case rather than onto the floor or into the air. Work your way around all blades, shaking the pillowcase gently between blades or using a fresh one if it gets very full.
The pillowcase approach traps the loose, fluffy dust that a dry cloth just pushes sideways. You’ll still need a damp cloth afterward for the stuck-on grime, but you remove the bulk first.
Step 4: Wipe Blades with a Damp Microfiber Cloth
Dip your microfiber cloth in warm soapy water, wring it out thoroughly — it should be damp, not wet — and wipe each blade on both sides. Pay attention to the leading edge (the side that faces the direction of spin), where grease and dust compact into a firm ridge.
For kitchens or anywhere near cooking fumes, the buildup is often sticky rather than dry. A white vinegar solution cuts through this more effectively than plain soap. Apply it, let it sit for 30 seconds, then wipe.
Do not soak the blades. Most fan blades are wood or wood composite with a lacquered finish; excessive moisture can warp them over time.
Step 5: Dry the Blades Immediately
Follow the damp cloth with a dry microfiber cloth. This removes any remaining moisture and leaves a light buff that reduces static, which in turn slows how quickly dust re-settles. Skip the drying step and you risk water spots or, on wooden blades, gradual warping.
Step 6: Clean the Motor Housing and Light Kit
The motor housing — that central canopy — collects dust and sometimes dead insects in the vents. Use a dry paintbrush or soft cloth to clear the vents first, then wipe the exterior with a barely-damp cloth.
If the fan has a light kit:
- Remove glass shades if they detach easily and wash them separately in the sink.
- Wipe bulbs with a dry cloth only — never apply liquid directly to a light bulb.
- Check that bulbs are screwed in firmly while you’re up there.

Step 7: Wipe the Fan Pull Chains and Check the Blade Brackets
Pull chains are touched constantly and get grimy. A quick wipe with a damp cloth handles this in seconds.
While you’re at it, look at the blade brackets (also called blade irons) — the metal arms attaching each blade to the motor. Loose screws here are the most common cause of a wobbly, noisy fan. If any feel loose, tighten them with a screwdriver before you climb down.
How Often Should You Clean a Ceiling Fan?
For most homes, a quick dusting every 2–4 weeks prevents serious buildup, and a full damp wipe-down every 3–4 months is sufficient. Adjust based on your situation:
- Pets in the house: more often — dander and hair accelerate fouling
- Kitchen fans: monthly damp cleaning minimum due to cooking grease
- High-humidity rooms (bathrooms, laundry rooms): monthly, and inspect for any mold near the motor housing
- Seasonal use: if you only run the fan in summer, clean it before you turn it on for the season and once after you stop using it
A useful habit: pair ceiling fan cleaning with another monthly task you already do, so it doesn’t slip. The whole job takes less time than brewing a pot of coffee once you’re set up.
For more ways to stay ahead of household grime on a daily basis, check out 10 Tips for Keeping a Clean Kitchen Every Day.
Tips to Keep Blades Cleaner for Longer
Run the fan on low when you’re not in the room. Constant gentle movement prevents the kind of static charge buildup that draws dust. Counterintuitively, fans that sit completely still for long stretches collect dust faster on their top surfaces.
Apply a very light coat of furniture polish or car wax to blade surfaces after cleaning. This creates a slick surface that repels dust and reduces static. Use sparingly — a thin, buffed-out layer, not a coating you can see. This one tip alone can extend the time between deep cleans noticeably.
Improve general air filtration. Upgrading to a quality HVAC filter rated MERV 8 or higher reduces the volume of airborne particles that ever reach the fan blades. It won’t eliminate the chore, but it reduces frequency.

If dust buildup is a recurring problem throughout your home, How to Clean Window Blinds: The Complete Method Guide offers similar techniques for tackling another common dust magnet.
Safety Reminders Worth Repeating
Ceiling fan cleaning injuries are almost always ladder-related. A few rules:
- Never stand on a chair; use a proper step ladder rated for your weight
- Keep your center of gravity between the ladder rails — don’t lean far to one side
- Have someone nearby if the ladder feels at all unsteady
- Confirm the fan is off before touching any blade
For very high ceilings (above 10–12 feet), extendable cleaning poles with microfiber heads allow you to reach blades from the ground for routine dusting, though a deep clean still requires safe elevated access.
Conclusion
Cleaning a ceiling fan properly takes a handful of household items and less time than most people assume. The pillowcase method for bulk dust removal, followed by a damp microfiber wipe and immediate drying, addresses both the fluffy accumulation and the greasy ridge on the leading edge — the two failure modes of a half-hearted cleaning job.
Get into a rhythm with it and it stops feeling like a chore at all. A clean fan moves more air, lasts longer, and doesn’t launch a cloud of allergens every time you switch it on. That’s worth 15 minutes every few months.