How to Clean a Coffee Maker Properly: Vinegar Rinse Beats Ruined Brews

If your morning cup has started tasting flat, bitter, or slightly off, the machine itself is probably the culprit — not the beans. Coffee makers accumulate mineral deposits, coffee oils, and mold faster than most people expect, and a neglected machine affects flavor long before it breaks down entirely.
This guide covers every cleaning task you actually need to do: the daily rinse, the deep descaling cycle, and the parts most people forget entirely.
Why Cleaning Your Coffee Maker Actually Matters
Coffee is brewed at around 90–96 °C (195–205 °F), but the warm, damp interior of a coffee maker is a hospitable environment for bacteria and mold — especially the reservoir, the drip tray, and the lid gasket. A 2011 study by NSF International found that the coffee reservoir ranked among the top ten germiest spots in the average household, with yeast and mold detected in about half of tested machines.
Beyond hygiene, hard water leaves calcium and magnesium scale on the internal heating element. That scale acts as an insulator, forcing the element to work harder to reach brewing temperature. The practical result: weaker coffee, longer brew times, and eventually a shortened machine lifespan.
Finally, stale coffee oils coat the carafe, filter basket, and internal tubing. Those oils go rancid over time and impart a bitter, musty note that no amount of fresh beans can overcome.

Daily and Weekly Cleaning Tasks
Most of the battle is fought with small, consistent habits — not heroic deep-cleaning sessions once a year.
After Every Brew
- Empty the carafe immediately. Coffee left sitting turns acidic and stains glass faster.
- Discard used grounds. Wet grounds left in the basket grow mold within 24 hours in a warm kitchen.
- Rinse the carafe, filter basket, and lid with hot water. A quick swirl with a drop of dish soap, then a rinse, is enough for daily upkeep.
- Leave the reservoir lid open after you finish brewing so it can air-dry completely. A closed, damp reservoir is where mold takes hold.
If you’ve ever splashed a fresh drip onto your favorite top, How to Remove a Coffee Stain from a Shirt: Dish Soap Beats Tannins explains how to lift the tannins before they set.
Weekly
Once a week, take the removable parts — carafe, lid, filter basket, and any permanent filter — and wash them properly:
- Fill your sink with warm water and a squirt of dish soap.
- Soak the parts for five minutes.
- Scrub the carafe with a bottle brush, paying attention to the pour spout and lid seal.
- Scrub the filter basket; coffee oils tend to concentrate in the corners and the mesh if you use a permanent filter.
- Rinse everything thoroughly and air-dry before reassembling.
Wipe the exterior of the machine, the warming plate, and the underside of the brew head with a damp cloth. Dried coffee splatter on the warming plate burns and smells acrid the next time the machine heats up.
How to Descale a Coffee Maker with Vinegar
Descaling removes the mineral buildup (limescale) from the internal water path and heating element. How often you need to do it depends entirely on how hard your tap water is. In soft-water areas, every three to six months is reasonable. In hard-water regions, monthly descaling will noticeably improve your coffee.
Distilled white vinegar is the classic descaling solution — cheap, effective, and food-safe. Commercial descaling tablets (Dezcal, Urnex, and similar products) are a slightly gentler option that leave no residual vinegar smell. Either works.
Vinegar Descale: Step by Step
What you need:
- Distilled white vinegar
- Fresh water
- An empty carafe
Steps:
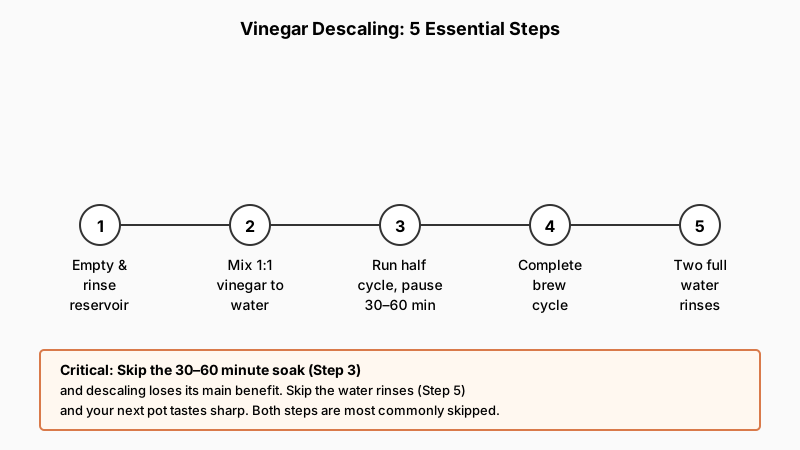
- Empty and rinse the reservoir. Make sure there’s no coffee or old water sitting in it.
- Mix the descaling solution. For most drip machines, a 1:1 ratio of white vinegar to water fills the reservoir to about the 4–6 cup line. You don’t need to fill it to maximum — you just need enough liquid to run a full cycle.
- Place the empty carafe and a paper filter (or permanent filter) in position. This catches any loosened scale debris.
- Run half a brew cycle, then pause. Switch the machine off (or hit pause if yours has that feature) when the carafe is about half full. Let the vinegar solution sit in the internal tubing and heating chamber for 30–60 minutes. This soak is the step most people skip — and it’s the most effective part of the process.
- Resume and complete the brew cycle.
- Discard the vinegar solution.
- Run two full cycles with plain cold water, using a fresh carafe of water each time. This flushes the vinegar taste out of the system. Skipping this step is what gives people that sharp vinegar note in their next pot of coffee.
- Smell the carafe. If there’s still a vinegar odor, run a third rinse cycle.

Using a Commercial Descaler
If you prefer tablets or liquid descalers, follow the product instructions — the proportions differ by brand. The general principle is the same: dissolve or pour the descaler into the reservoir, run a partial cycle, soak, complete the cycle, then rinse with fresh water cycles until the machine is clean.
Some modern machines (Breville, De’Longhi, Moccamaster) have a descale indicator light or a dedicated cleaning mode. Use that mode rather than approximating a cycle yourself — the machine’s built-in program controls flow rate and temperature to optimize the cleaning.
The Parts People Routinely Miss
These are the spots that get skipped during casual cleaning and quietly degrade both hygiene and flavor:
The Reservoir Lid and Gasket
The rubber or silicone gasket around the reservoir lid collects mold and slime. Pull the lid off entirely if it’s removable, and scrub the gasket with a small brush — an old toothbrush works perfectly. Rinse it well and dry it before replacing.
The Showerhead or Spray Disc
On most drip machines, water enters the brew basket through a spray disc or showerhead — a small perforated plate above the filter. Coffee oil and mineral residue clog the holes over time, creating uneven water distribution and under-extraction. Remove it (usually a quarter-turn or a pull), soak it in warm soapy water for ten minutes, and clear the holes with a toothpick or thin brush.
The Warming Plate
Burn residue on the warming plate affects the smell of your kitchen and can slightly taint the coffee aroma. Once the plate is completely cool, scrub it with a paste of baking soda and water using a non-scratch pad. Wipe clean with a damp cloth. Never use abrasive steel wool — it scratches the coating and makes the problem worse over time.
The Carafe Lid
Most carafe lids have a small silicone flap or valve that rarely gets cleaned. Disassemble it if possible, scrub it, and rinse. Those valves trap stale coffee in every seam.

Cleaning a Single-Serve Pod Machine
Pod machines (Keurig, Nespresso, and similar systems) have different geometry but the same problems: scale, mold, and stale oil. The process differs slightly from drip machines.
- Descale the same way — most pod machines have a descale mode. Follow the manufacturer’s guide, as reservoir size and cycle length vary.
- Clean the needle. Keurig machines have an entry needle and an exit needle that puncture the pod. Both clog with grounds and dried coffee. Keurig sells a cleaning tool for this, or you can carefully clear the holes with a straightened paper clip while the machine is unplugged.
- Remove and wash the drip tray and pod holder weekly with warm soapy water.
- Wipe the brew head area after every few uses — coffee residue builds up around the pod insertion point.
Cleaning an Espresso Machine or French Press
Espresso machines require backflushing the group head with a blind basket and a small amount of espresso machine cleaner (such as Cafiza) on a schedule — typically weekly for home use. The portafilter, basket, and steam wand all need daily attention; milk residue on the steam wand dries hard within minutes and can harbor bacteria.
French presses are simpler. Disassemble the plunger completely (most have four or five pieces) and wash each part individually. Coffee oils concentrate between the mesh screens and the spiral plate, and a quick dunk in the carafe doesn’t remove them.
If your coffee maker isn’t the only kitchen workhorse overdue for attention, How to Deep Clean Kitchen Appliances Step by Step walks through the rest of the fleet, from blenders to toasters.
Quick Reference: Cleaning Schedule
| Task | Frequency |
|---|---|
| Rinse carafe, basket, lid | After every use |
| Wash removable parts with soap | Weekly |
| Wipe exterior and warming plate | Weekly |
| Clean spray disc / showerhead | Monthly |
| Descale with vinegar or tablets | Every 1–3 months |
| Deep-clean reservoir gasket | Monthly |
Conclusion
Cleaning a coffee maker properly isn’t complicated — it’s mostly a matter of doing the right small tasks consistently and scheduling a descale before the machine starts complaining. The daily rinse takes thirty seconds. The weekly wash takes five minutes. The descale cycle takes mostly waiting.
Do those three things on schedule and your machine will brew better coffee, last longer, and never develop the sour, muted flavor that drives people to blame their beans when the real problem has been sitting on their counter the whole time.